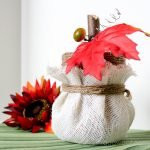
Today I get to participate in another awesome monthly theme with #myfavoritebloggers! Because we tend to like fruits and veggies... and because, ya know, it's Fall these days... this month we're all sharing something relative to pumpkins! I love how my contribution turned out- these little pompom fabric pumpkins are so stinkin' cute!
Looks like you're in for a treat, eh?! I'm anxious to get around and check out all of their posts myself! This month there's even a few more of us playing along:
I appreciate and enjoy these talented ladies so much and I know you will too! There'll be a link to each of their projects at the bottom of this post :)
As for my Fabric PomPom Pumpkins, let's make a few, eh? So that you can take about 500 pictures of them like I did :) These are super fast to make- no sewing and even very little glue involved. Really fun, simple fall decor :)
I recently got this cute fabric for $2.50 a yard at JoAnn! I got several coordinating ones too and hope to be able to do a few more fall projects with them :) Start making your pompoms by cutting several strips of fabric down the shorter end, two to three inches wide each strip. I didn't measure these at all, just eyeballed. I also used three strips per pompom...
Next take one strip at a time and wrap it around the palm of your hand like above. Keep it fairly tight, but still quite loose. When you're done wrapping, lay the fabric down and tie through the middle (I used embroidery floss) like below...
I noticed tying just a little bit loose- still snug, but not tight- helped later on. With your tie done, cut through all of your layers of fabric on each side of this "bow" you've created.
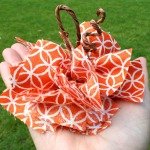
And then started pulling apart and puffing out the ends like above. This takes just some tuggin and twisting and pulling- nothing that will ruin the whole thing, just some general finger piecing :)
When you're happy with your pompom, next you can move on to the stem part. I used a craft wire called Naturally Wired that I also got at JoAnn. Same stuff that I used for my Valentine Wreath and Curly Paper Wreath earlier this year.
Cut a 10 to 12 inch length of the wire with crummy scissors or a wire cutter. Start shaping the wire by twisting a long tallish loop at one end. Then with the remaining length, wrap around a pen or marker to create a cute little curly "vine." Pull and shape it from there as you like :) When your satisfied with the wire, place a good dab of hot glue where the loop and the curly section meet...
... and attach to what you want to be the top of one of your pompom pumpkins.
Ta Da- cute cute cute! Now you're ready to do it all over again a bunch of times and add to your fall decor! Oh, and take all those pictures ;)
So do you think they really look like pumpkins? I kinda wondered at first, but then Cooper made some comment about the pumpkins on our mantle- so, I figured they were closer to the mark than not! I'm anxious to start seeing those cute little pie pumpkins in grocery stores so I can intermingle them with these on my mantle...
Which, clearly, sits incomplete as of now- summertime ending denial anyone? I'm getting closer to getting over it thanks to these little cuties! Hope you enjoy making a few and make sure to check out the rest of my favorite bloggers pumpkin creations below too- such a great variety!


