
Today you can find me at

with a tutorial for some quick, clever Bib Clips
that will make a great addition to your next baby shower gift!

And Ginger is here at Capital B to
cure some Spring Fever for you!
This is my first blog swap- come visit me over at GingerSnaps!!
And if you've come here from there, welcome welcome!
Hi! I'm Ginger from over at Ginger Snaps Crafts
(It's brand new, so please come follow along!)
I love, love. love followers!
I am so excited that Sky asked me
to be a guest over on her lovely blog.
Thanks, Sky!
I met Sky through whoopdwhoop.com.
(It's a fun place where you list your creations,
trade whoops, earn whoops & get stuff!)
It is so much fun!
I've swapped Sky for
some of her creations.
Love them! :)
She is such a talented artist!
(I think the best part of whoopdwhoop
is the wonderful people you get to meet!)
Spring is finally in the air!
(It was a very, very long winter for us! How about you?)
Time to get out the fun spring decor. :)
I just recently added this fun spring block
to my etsy shop, Ginger Snaps.
(You can buy it finished or as a kit make your own!)

Here's how I made it:
(Easy!)
1. First cut a 2 x 4 into a block that measure 3 1/2 inches by 7 inches long.

2. Slightly sand your block, paying special attention to the edges.

3. Choose a paint color. I chose a bright purple. :)

4. Paint your block. It took me about 2 coats. Let it dry.

5. You will use the vinyl negative (the part you usually throw away) as a stencil.
You can cut your own vinyl negative using a Cricut or Silhouette.
I used the elise font. (My favorite!)
(You can also buy one from my esty shop!)
You can cut your own vinyl negative using a Cricut or Silhouette.
I used the elise font. (My favorite!)
(You can also buy one from my esty shop!)
Apply your vinyl lettering to your block of wood.

Make sure you press down firmly with your hand or a credit card.
(You don't want any air pockets or loose areas.)

6. Using bright spring-like colors carefully paint each letter a different color.
(Let them dry between coats.)
(Let them dry between coats.)

7. After your paint has dried completely.
(I let mine dry over night, just to be sure!)
Carefully peel back your vinyl negative.

8. Touch up any areas you might need to.
(You'll be amazed on how good a job vinyl can be when used as a stencil! :) )

9. Tie a matching bow around your block.
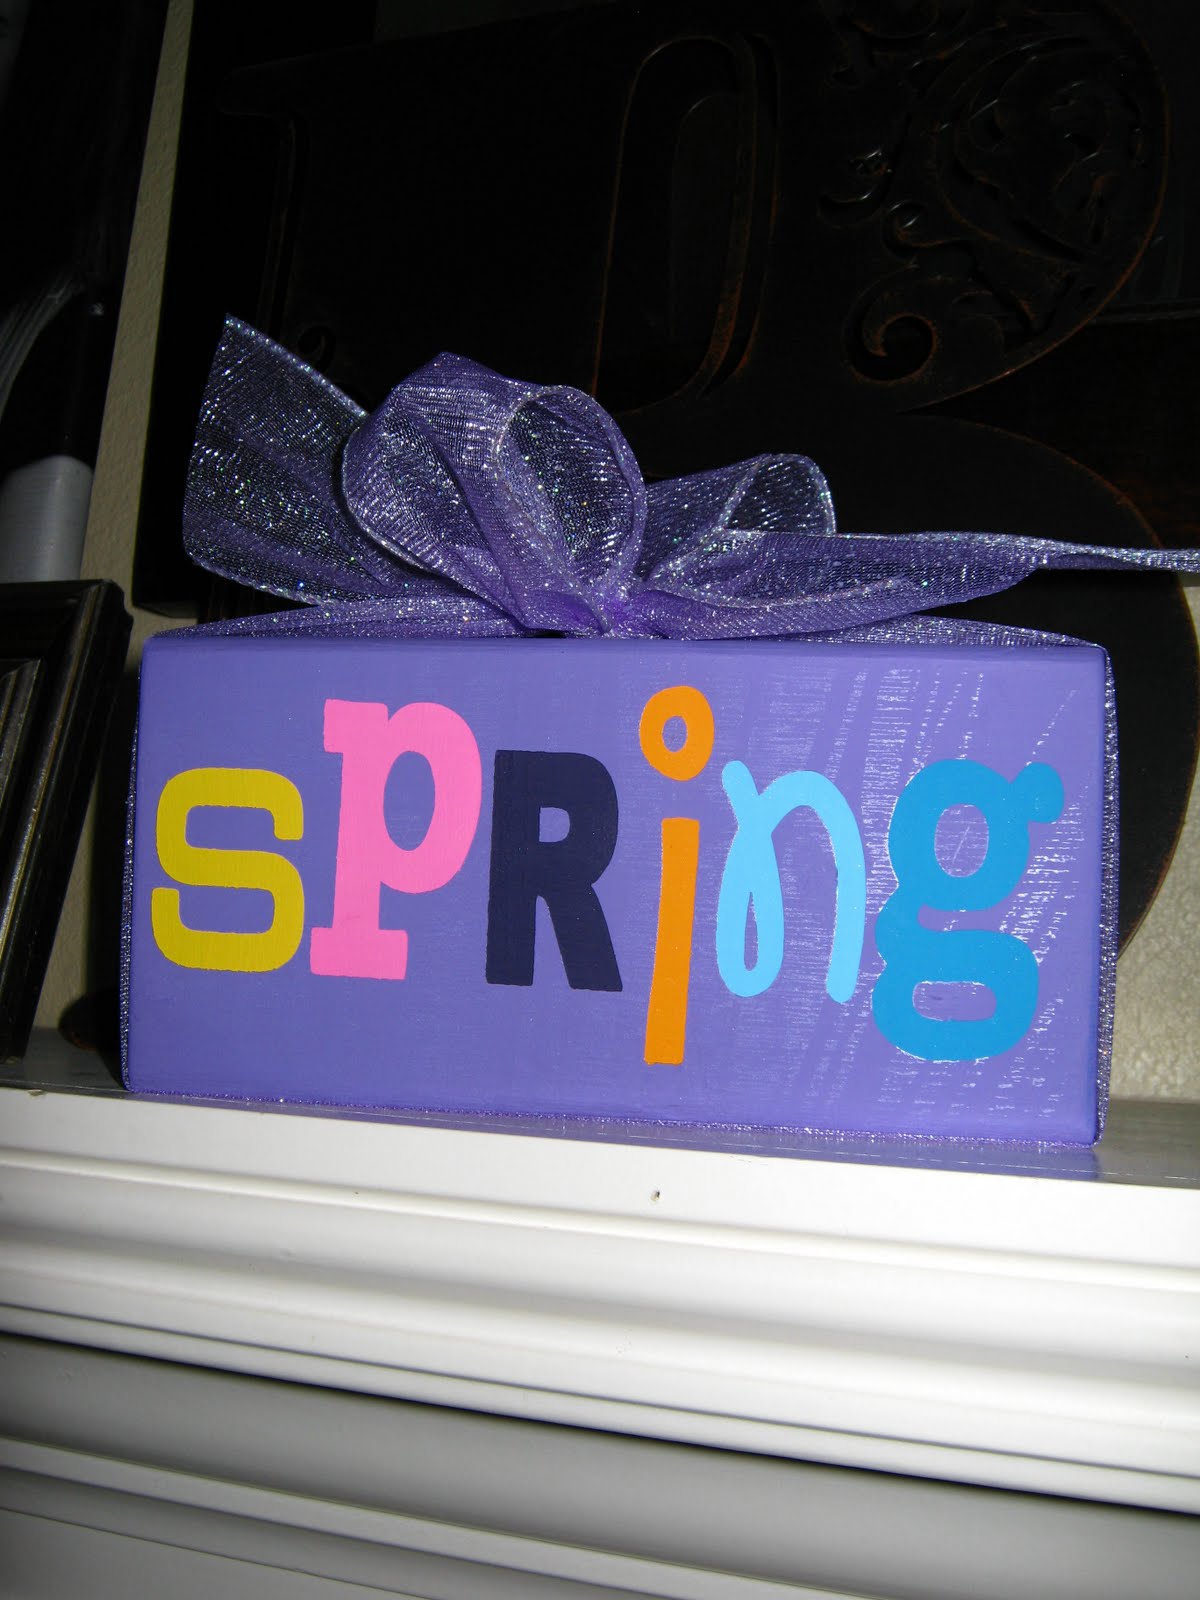
10. Enjoy!
Thanks again, Sky!
